Essential DIY Survival Tools Every Adventurer Should Include in Their Kit
Mastering Effective Water Purification Techniques for Emergency Situations
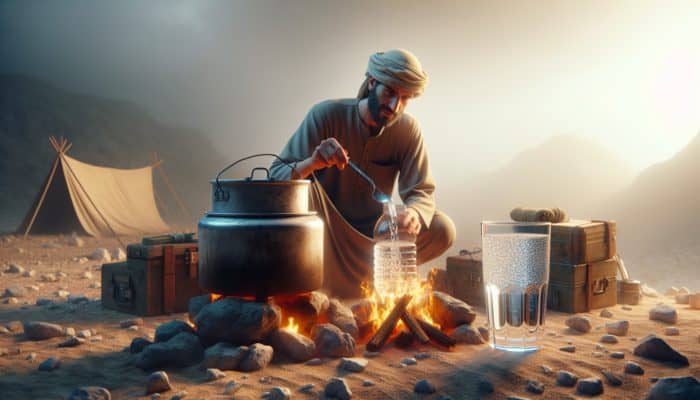
Creating homemade survival gear is crucial for ensuring access to safe drinking water during emergencies. Implementing effective water purification techniques using common household items can effectively eliminate harmful bacteria and contaminants from potentially unsafe water sources. One of the most reliable methods is the boiling technique, where water is heated to a rolling boil for at least one minute. This process is exceptionally effective in killing pathogens and is accessible to anyone in a survival situation, as it requires no specialized equipment. This method not only ensures the water is safe to drink but also enhances your confidence in managing water safety in dire situations.
Another effective technique for purifying water involves using charcoal, which can be produced by burning wood. Allow the charcoal to cool, crush it into small pieces, and layer it with sand and gravel in a homemade filter. This filtration system effectively removes impurities, enhances the water’s taste, and improves clarity, making it safer and more pleasant to drink. Utilizing natural materials in this way not only provides a practical solution but also connects you with the environment, enhancing your survival experience.
Additionally, you can employ chemical treatment using unscented household bleach as a purifying agent. To purify one liter of water, add just two drops of bleach, mix it thoroughly, and let it sit for at least 30 minutes. If you can still detect a bleach odor afterward, repeat the process to ensure all contaminants have been effectively neutralized. This method is particularly useful when you're in a pinch and need to ensure water safety quickly.
When exploring the wilderness, a solar still can be a lifesaving tool for collecting water. To create one, dig a hole, place a container in the center, and cover the hole with plastic wrap, securing the edges with stones. As the sun heats the ground, moisture evaporates, condenses on the plastic wrap, and drips into the container, providing drinkable water in challenging conditions. This innovative technique underscores the resourcefulness that is essential for any adventurer.
- Boiling water for purification
- Utilizing charcoal as an effective filter
- Adding bleach to disinfect water
- Constructing a solar still for sustainable water collection
Crafting Creative Fire Starters from Common Household Items
Creating fire starters from everyday materials is vital for warmth, cooking, and signaling for help in survival scenarios. One effective method is to use cotton balls dipped in petroleum jelly. Coat the cotton balls, allow them to harden, and store them in a waterproof container. When you need to use them, simply pull apart the cotton and ignite it with a spark, providing you with a reliable and consistent flame source. This technique not only ensures you have a dependable fire starter but also reinforces your ability to utilize available resources efficiently.
Another popular method involves utilizing cardboard egg cartons. Fill the sections of a cardboard egg carton with dryer lint and pour melted wax over them. Once they have cooled, you can break apart the carton, providing several compact fire starters that burn for an extended duration, making them ideal for igniting a fire in challenging conditions. The combination of materials enhances your chances of success when trying to start a fire in adverse weather.
You can also create fire starters using cardboard tubes from toilet paper rolls. Stuff them with lint or dry grass, dip the ends in wax, and allow them to dry completely. These lightweight and compact fire starters are perfect additions to your survival kit, making them easy to carry wherever you go. Their simplicity and effectiveness exemplify how everyday items can be transformed into vital survival tools.
Additionally, don’t underestimate the utility of tree bark and resin. Certain trees, particularly pines, produce resin that ignites easily and burns hot. Collect small pieces of dry bark and resin to use as natural fire starters, which can be particularly effective in damp conditions where finding dry tinder may pose a significant challenge. This natural resource highlights the importance of being observant and resourceful in your environment.
- Cotton balls and petroleum jelly for easy ignition
- Cardboard egg cartons filled with dryer lint for extended burning
- Toilet paper tubes stuffed with dry materials as compact fire starters
- Tree bark and resin for natural fire-starting options
Building Improvised Shelters for Effective Weather Protection
Constructing an improvised shelter is vital for protecting yourself against harsh weather elements such as rain, wind, and cold temperatures. The first step is to assess your surroundings for available resources, including fallen branches, leaves, and natural features like rocks and hills. A lean-to shelter is one of the simplest and most effective structures you can create using the materials available in your environment. This method not only provides immediate protection but also allows you to engage creatively with your surroundings.
To create a lean-to, locate a long, sturdy branch and prop it against a tree at an angle to form a sloped roof. Then cover one side with smaller branches, leaves, or grasses to insulate against wind and rain. Make sure to create a dry space on the ground using leaves or pine needles to enhance comfort and warmth during your stay. This attention to detail can significantly improve your overall experience in the wild.
If you find yourself in an area with ample snow, consider building a quincy, which provides exceptional insulation. To build a quincy, gather snow and pile it into a mound. Once compacted, carve out a small entrance and hollow out the inside to create a cozy space that can effectively shield you from the elements. This method demonstrates how natural materials can be used innovatively to enhance your safety and comfort.
In regions rich in foliage, constructing a debris hut could be an excellent option. This involves building a frame using branches and covering it with leaves and moss to provide insulation. The key to all these shelters is to ensure they are elevated off the ground and have a solid roof to keep you dry and warm during inclement weather. This adaptability is crucial for survival in varying environments.
- Building a lean-to shelter from available branches
- Constructing a quincy in snowy conditions for insulation
- Creating a debris hut using local foliage
- Insulating your shelter with leaves and moss for warmth
Essential First Aid Techniques to Enhance Emergency Preparedness

Mastering fundamental first aid techniques is crucial for significantly enhancing your chances of survival during emergencies. One essential skill is learning how to treat cuts and scrapes using readily available household items. Start by cleaning the wound with fresh water or a saline solution to effectively remove dirt and bacteria. If possible, apply an antiseptic solution, such as diluted hydrogen peroxide or rubbing alcohol, before covering the wound with a clean bandage to prevent infection. This proactive approach can make a significant difference in recovery and overall health during emergencies.
For more severe injuries, such as sprains, using a cold compress can be very effective. You can create one by wrapping ice in a cloth or utilizing a bag of frozen vegetables. Apply it to the injured area for 15-20 minutes to reduce swelling and alleviate pain, providing much-needed relief during stressful situations. This quick response can help manage injuries effectively, ensuring you can continue your survival efforts.
In the event of insect stings or bites, a paste made from baking soda and water can help alleviate itching and swelling. Apply the paste directly to the sting site and let it sit for 15 minutes before rinsing. For any allergic reactions, it’s crucial to have an antihistamine available, as well as knowledge of how to use an EpiPen if you find yourself in a high-risk area. This preparedness can be life-saving in critical situations.
Lastly, it’s critical to learn CPR (Cardiopulmonary Resuscitation). Familiarize yourself with the correct technique, particularly the rhythm of compressions and rescue breaths. Being prepared to respond effectively in critical situations can save lives when every second counts. This skill is invaluable, providing you with the confidence to act decisively when necessary.
- Cleansing wounds with saline or fresh water
- Applying a cold compress to treat sprains and reduce swelling
- Using a baking soda paste for insect bites and stings
- Learning CPR techniques for emergency situations
Expert Insights on Crafting Homemade Survival Gear
Real-World Examples Showcasing the Effectiveness of Homemade Survival Gear
In various survival scenarios, homemade gear has proven to be invaluable. Consider the case of a hiker lost in the wilderness who utilized natural materials to create an effective shelter and fire starter. By foraging for dry leaves and sturdy branches, they constructed a lean-to and used cotton balls from their backpack, mixed with petroleum jelly, to start a fire. This resourcefulness kept them warm throughout the night, showcasing the importance of utilizing the materials readily available in your environment. Such examples underline the effectiveness of creativity in survival situations.
Another compelling example comes from a group of campers who faced unexpected flooding. Using plastic bags and duct tape, they fashioned improvised dry bags to protect their supplies. This quick thinking allowed them to preserve vital gear and food, demonstrating the efficacy and ingenuity of homemade survival gear in crisis situations. Their adaptability highlights how essential it is to think on your feet in emergencies.
To replicate these successful examples, start by assessing your environment for available resources. Familiarize yourself with common plants and materials that can be used to create shelters or tools. Practicing building your shelter at home before venturing out can be beneficial, and keeping a small kit of essential items, such as paracord, duct tape, and a multi-tool, handy can make a significant difference, as these can often be repurposed into various survival gear. This preparation can enhance your confidence and readiness for any situation.
- Creating a lean-to shelter for warmth and safety
- Using plastic bags as improvised dry bags for protection
- Repurposing natural materials found in the environment
- Keeping essential tools on hand for versatility and adaptability
Expert Analysis on the Reliability of DIY Survival Tools
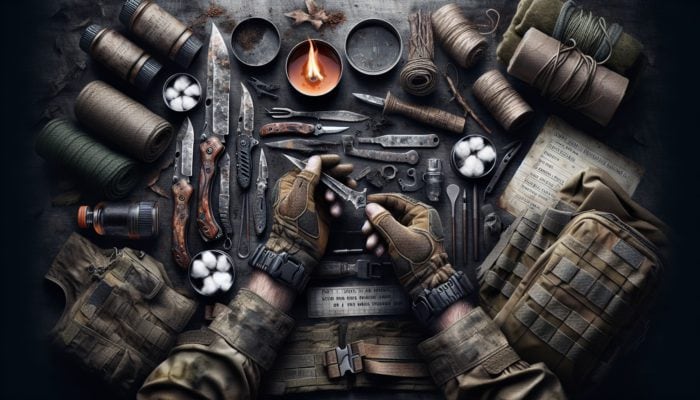
Expert survivalists frequently advocate for creating your own survival gear, as it can be more tailored to individual needs and specific situations. Many survival experts highlight the reliability of DIY tools, especially when commercial options may be unavailable. A common recommendation is to focus on multi-purpose tools. For instance, a sturdy knife can serve as a cutting tool, fire starter, and even a makeshift splint when necessary. This versatility is essential for effective survival.
To enhance the effectiveness of your DIY gear, consider the following expert recommendations. First, always opt for high-quality materials; for fire starters, cotton and petroleum jelly provide a long-lasting burn. Second, practice using your gear before it’s needed in a survival scenario. Familiarity breeds confidence, which is crucial in stressful situations. Third, keep your gear waterproof; utilizing materials like ziplock bags or waterproof containers can protect vital tools from the elements. This preparation can ensure that your gear is ready when you need it most.
Lastly, ensure your gear is lightweight and compact, facilitating easy transport during hikes or expeditions. By adopting these strategies, you’ll enhance the reliability and effectiveness of your homemade survival tools, ensuring you are prepared for any situation that may arise. This foresight can make all the difference in critical moments.
- Using multi-purpose tools for enhanced versatility
- Practicing with your DIY gear to build confidence and familiarity
- Choosing high-quality materials for durability and reliability
- Keeping gear lightweight and compact for easy transport
Step-by-Step Guide to Crafting Multi-Purpose Survival Tools
Creating multi-purpose survival tools is a game-changer for enhancing the efficiency and effectiveness of your survival kit. Start with a paracord bracelet, which serves as a fashionable yet functional survival tool. Not only does it look stylish, but it can be unraveled to provide you with strong cordage for building shelters, securing gear, or even creating fishing lines when necessary. This versatility means that what appears to be a simple accessory can serve multiple critical functions.
Another excellent example is the combination of a knife and a fire starter. You can create a survival knife that also features a built-in fire starter. Attach a small piece of magnesium rod to the handle; when you need to start a fire, scrape off some magnesium shavings with the knife blade to spark an ember, providing you with a reliable fire source. This ingenuity combines two essential survival needs into one tool.
Consider a fishing kit that doubles as a sewing kit. Use a small, waterproof container to store fishing hooks, line, and sinkers. Include a few needles and sturdy thread for stitching wounds or repairing gear. This dual-purpose approach minimizes the number of items in your kit while maximizing their utility and versatility. This efficiency is key for effective survival preparedness.
Lastly, a signal mirror can serve both as a signaling device and a makeshift reflective surface for fire-starting. By polishing a piece of metal or glass, you can effectively signal for help while also having the means to start a fire using sunlight, which is crucial in emergencies. This multi-functionality enhances the capability of your survival tools.
- Crafting a paracord bracelet for multiple uses
- Creating a fire-starting knife with a built-in magnesium rod
- Combining fishing and sewing kits into one compact container
- Making a signal mirror that doubles as a fire starter
Key Advantages of Homemade Survival Gear
Cost-Effectiveness of Homemade Gear in Survival Situations
Homemade survival gear is often significantly more cost-effective than purchasing commercial alternatives. By utilizing materials you already have at home or can find in nature, you can substantially reduce your expenses. For example, creating a fire starter from cotton balls and petroleum jelly costs just a few pence, whereas commercial fire starters can be significantly more expensive. This financial efficiency is a vital benefit for anyone preparing for emergencies.
Moreover, many DIY projects require minimal investment in materials that serve dual purposes. A water purification system can be constructed using readily available items like charcoal and sand, eliminating the need for costly filtration systems that may not be practical in emergency situations. This approach not only saves money but also encourages creativity in problem-solving.
Furthermore, you can customize your equipment to better fit your specific needs without overspending. This adaptability allows you to maximize functionality while adhering to a budget. Additionally, investing time in crafting your gear helps develop skills that will pay off in real-world survival situations, making DIY gear not only cost-effective but also a wise investment in your preparedness. This skill-building aspect is invaluable for enhancing your overall survival capability.
- Using found materials to significantly reduce costs
- Repurposing common household items for effective gear
- Reducing reliance on expensive commercial alternatives
- Maximizing the utility of each item in your survival kit
The Customization Benefits of DIY Survival Tools
One of the greatest advantages of making your own survival gear is the ability to customize it to fit your unique needs. When you create your tools, you can tailor them to suit your environment, personal preferences, and specific survival scenarios. For instance, a shelter constructed from local materials can be designed to withstand the unique weather patterns of your area, offering better protection than a one-size-fits-all commercial tent that may not provide adequate shelter. This personalization enhances your overall effectiveness in survival situations.
Customization also allows for incorporating personal touches that enhance comfort and usability. You can choose the dimensions of your gear to ensure it fits comfortably in your hands or packs. This level of personalization helps improve your efficiency and effectiveness when using the tools during critical moments. The comfort factor plays a significant role in maintaining morale during survival challenges.
Moreover, DIY gear can be adapted as your skills and knowledge grow. As you learn new techniques or discover different environments, you can modify your equipment accordingly. This adaptability enhances your preparedness and confidence, knowing you have crafted gear that is not just effective but also perfectly aligned with your survival philosophy and approach. This dynamic aspect of survival gear crafting can significantly boost your chances of success in emergencies.
- Tailoring gear to your specific environment for enhanced effectiveness
- Incorporating personal preferences into your designs for comfort
- Adapting tools as your skills improve for ongoing efficiency
- Maximizing comfort and usability in your equipment through customization
Enhancing Self-Reliance Through the Creation of Homemade Gear
Absolutely! Crafting your survival gear fosters a sense of self-reliance that is invaluable in emergencies. By learning to create your own tools, you become less dependent on commercial products and more attuned to your surroundings. This self-sufficiency encourages creative problem-solving, allowing you to navigate challenges with the resources available to you. This resourcefulness is a critical survival skill that can make a significant difference in dire situations.
The process of creating gear also builds confidence. As you successfully produce and utilize your tools, you reinforce your belief in your abilities. This newfound confidence translates into better decision-making during stressful situations, enabling you to remain calm and focused when it matters most. Such confidence can be a game-changer in survival scenarios.
Moreover, as you engage in the practice of making gear, you develop a deeper understanding of the materials and techniques involved in survival. This knowledge empowers you to improvise effectively when challenges arise, whether it’s using natural materials for a shelter or creating a fire starter from everyday items. The result is a more self-reliant and capable individual, ready to face any survival situation that may occur. This preparation can ultimately enhance your overall survival experience.
- Fostering a sense of independence in survival situations
- Building confidence through skill development and practice
- Improving problem-solving capabilities with resourcefulness
- Encouraging creative improvisation with available materials
Developing Skills Through the Crafting of Homemade Gear
Creating your survival gear is an excellent way to develop a variety of essential skills critical in emergencies. Engaging in DIY projects teaches practical crafting techniques that enhance your dexterity and hand-eye coordination. These skills become crucial when you need to create something quickly or repair essential gear in the field, where time and resources may be limited. This hands-on experience can be invaluable in high-pressure situations.
Additionally, the process often requires research and planning, which helps improve your critical thinking abilities. As you determine what tools you need and how to construct them, you’re honing your problem-solving skills. This mental exercise prepares you for unexpected challenges during survival situations, enhancing both your cognitive and practical capabilities. Such preparedness is essential for effective survival management.
Furthermore, using homemade gear fosters a greater understanding of your environment. By learning to identify useful plants, materials, and resources, you build a connection with nature that becomes invaluable in survival scenarios. This comprehensive skill set establishes a solid foundation that can be built upon as you gain experience and knowledge in the field. This connection to your environment enhances your overall survival strategy.
Lastly, you become a more resourceful individual. The ability to adapt and create gear with limited resources is a key survival skill that can be applied in various situations, whether you’re in the wilderness or facing an urban emergency. This versatility is critical for any adventurer.
- Improving crafting skills and hand-eye coordination for practical tasks
- Enhancing critical thinking through planning and research
- Building an understanding of local resources and materials
- Encouraging resourcefulness in diverse situations
Food Preservation Techniques for Effective Survival Management
How to Smoke and Dry Food for Extended Shelf Life
Smoking and drying food are ancient preservation methods that extend the shelf life of your supplies while retaining essential nutrients. To begin smoking food, you can create a simple smoker using a few household items. Utilizing a metal container with a lid, place wood chips at the bottom and position your food on a rack above. As the wood burns, it releases smoke, infusing your food with rich flavors while simultaneously killing potential bacteria that could lead to spoilage. This method not only preserves food but also enhances its taste, making it a valuable skill in survival situations.
Drying food is another reliable method for preservation. You can use the sun, an oven, or even a dehydrator to effectively remove moisture. To sun-dry fruits and vegetables, slice them thinly and lay them out on a clean screen or mesh. Cover them with a thin cloth to protect against insects. The sun’s heat will gradually remove moisture, allowing the food to be stored for months without refrigeration. This natural drying process is an effective way to ensure food availability in emergencies.
When using an oven, set it to the lowest temperature and leave the door slightly ajar to allow moisture to escape. Regularly check on the food to prevent overcooking and ensure it dries evenly without becoming too brittle. This method is particularly useful when you need to preserve food quickly and efficiently.
Another option is to invest in a dehydrator, which is an excellent tool for long-term food storage. These devices provide controlled heat and airflow, ensuring even drying of your food. Dehydrated foods can be stored in airtight containers, preserving their nutritional value and flavor for extended periods. This investment can significantly enhance your food preservation capabilities.
- Creating a simple smoker with metal containers for flavor infusion
- Sun-drying fruits and vegetables for long-lasting preservation
- Using an oven or dehydrator for controlled drying processes
- Storing dried foods in airtight containers for maximum shelf life
Building a Solar Dehydrator for Sustainable Food Preservation
Constructing a solar dehydrator is a sustainable and cost-effective method for preserving food using the sun's energy. To create one, gather a few materials: a sturdy frame, mesh screens, and a clear plastic cover. Start by constructing a box frame that allows sunlight to enter from the top and sides. Use wood, metal, or durable plastic, ensuring it’s sturdy enough to hold your food securely. This DIY project can greatly enhance your food preservation efforts while utilizing renewable energy.
Next, add mesh screens to the interior to allow air circulation while keeping insects out. Position the dehydrator in a sunny location where it can receive direct sunlight for most of the day, maximizing its effectiveness. This strategic placement enhances the efficiency of the drying process.
You can enhance the efficiency of your solar dehydrator by painting the interior black to absorb more heat. Cover the top with a clear plastic sheet, which helps trap heat and moisture while allowing sunlight to penetrate effectively. This design maximizes the drying potential of your dehydrator, ensuring effective food preservation.
When ready to dry your food, slice it into thin pieces and arrange it on the mesh screens. Monitor the process to ensure the food dries evenly. Depending on the weather, this method can take anywhere from a few hours to a full day, making it a versatile option for preserving a wide range of foods. Utilizing solar energy in this way underscores your commitment to sustainable practices in your survival preparations.
- Constructing a sturdy frame for optimal sunlight exposure
- Using mesh screens for improved air circulation during drying
- Painting the interior black to enhance heat absorption for efficiency
- Covering with clear plastic for moisture retention during drying
Fermentation as a Valuable Survival Food Preservation Method
Fermentation is a time-honored method for preserving food while enriching it with beneficial probiotics. This technique not only extends the shelf life of food but also enhances its nutritional value, making it an invaluable skill in survival situations. Many foods are suitable for fermentation, including vegetables, fruits, and dairy products, which can be transformed into delicious, long-lasting provisions. This skill can provide vital nutrients during emergencies when fresh food may be scarce.
To ferment vegetables, start with cabbage to create sauerkraut. Shred the cabbage and mix it with salt, then pack it tightly into a clean jar, ensuring it’s submerged in its own juices. Cover the jar with a cloth and let it sit at room temperature for several days to ferment. You’ll know it’s ready when it has a tangy flavor and a slightly fizzy texture, indicating the presence of beneficial bacteria. This process not only preserves the cabbage but also creates a nutritious food source.
Pickles are another excellent option for fermentation. Cucumbers can be fermented in a brine solution with garlic, dill, and other spices added. Use the same method as with sauerkraut, allowing them to ferment for a week or two before consuming, resulting in a crunchy, flavorful snack that can last for months. This versatility in preserving food is a key advantage in survival situations.
Fruits can also undergo fermentation to create delicious treats. For instance, making kombucha is a great way to transform tea into a probiotic-rich beverage. Use a SCOBY (symbiotic culture of bacteria and yeast) to initiate the fermentation process, and let it sit for a week to develop flavor, providing a refreshing drink that supports gut health. This skill not only enhances your food options but also contributes to your overall well-being.
Fermented foods not only last longer but also contribute positively to gut health, making them invaluable in survival situations where meeting nutritional needs is crucial. This focus on health can significantly enhance your survival strategy.
- Creating sauerkraut from cabbage and salt for preservation
- Fermenting cucumbers to make flavorful pickles
- Using a SCOBY to ferment tea into refreshing kombucha
- Exploring a variety of vegetables and fruits for fermentation possibilities
Navigation and Signaling Tools for Wilderness Survival
Creating a Compass Using a Needle and Magnet
Crafting a compass is a simple yet effective way to navigate when lost in the wilderness. To make a basic compass, you will need a needle, a magnet, and a small container of water. Begin by magnetizing the needle by stroking it with a magnet in one direction, approximately 30 to 40 times. This process aligns the needle's molecules, allowing it to respond accurately to the Earth’s magnetic field. This simple tool can greatly enhance your navigation capabilities in unfamiliar terrain.
Next, find a small piece of cork or foam to float the needle on. Carefully insert the magnetized needle into the cork and place it in a bowl of water. As the needle floats, it will align itself along the North-South axis, allowing you to determine direction effectively. This homemade compass is particularly useful in wilderness scenarios where traditional navigation tools may be unavailable. The ability to navigate confidently can significantly improve your survival chances.
To enhance the accuracy of your compass, ensure you are away from metal objects and electronic devices, as these can interfere with its magnetic readings. With practice, you can master using your compass for navigation, significantly increasing your confidence in outdoor adventures. This understanding of navigation tools is a critical survival skill.
- Using a needle and a magnet to create an effective compass
- Floating the needle on a cork in water for stability and accuracy
- Ensuring accurate readings by avoiding metal and electronics
- Practicing compass navigation techniques in various conditions
Creating a Signal Mirror for Effective Emergency Signaling
A signal mirror is an effective tool for attracting attention and signaling for help during emergencies. You can easily create one using a piece of reflective material, such as glass or aluminum foil. Start by cutting the material into a manageable size, approximately 3 x 5 inches, for easy handling and portability. This simple tool can be invaluable in survival situations where visibility is limited.
To increase visibility, ensure that the reflective surface is clean and shiny. If using glass, polish it to maximize reflectivity. For aluminum foil, smooth out wrinkles to create a flat surface that will effectively reflect sunlight. This preparation can greatly enhance the effectiveness of your signaling efforts.
In practice, to use your signal mirror, position it to catch sunlight, directing the beam towards your target—whether that’s a passing aircraft or a distant search party. Practicing this technique during daylight hours can ensure you can successfully signal when the need arises, increasing your chances of being rescued. This proactive approach to signaling can be a lifesaver in emergencies.
Consider adding a bright color to the back of your mirror, such as orange or yellow, which can help make it more visible against natural backgrounds. A signal mirror can be a lifesaver in remote areas where traditional means of signaling are unavailable, making it essential for any survival kit. This multi-faceted tool emphasizes the importance of being prepared for various situations.
- Cutting reflective material into manageable sizes for ease of use
- Polishing glass or smoothing aluminum foil for optimal effectiveness
- Practicing directing sunlight towards potential rescuers
- Using bright colors on the back for increased visibility
Improvised Map-Making Techniques for Effective Navigation
Creating a map in unfamiliar terrain is crucial for navigation and planning your escape route. To make an improvised map, begin by gathering natural materials such as charcoal, mud, or sand. Find a flat surface, like a piece of bark or a large leaf, and use charcoal or mud to draw out the contours of the area, marking significant landmarks like rivers, mountains, or caves. This hands-on approach to navigation enhances your connection to the environment.
When sketching, pay attention to the scale; use a rough estimation of distances between points to provide a useful guide for navigation. Include notes regarding important resources such as water sources or potential shelter locations. The more detail you can incorporate, the better your chances of utilizing it effectively in a survival scenario. This attention to detail can greatly enhance your navigation skills.
If you have access to paper or a notepad, create a more permanent map by sketching it out, ensuring you include a compass rose for orientation. This permanent record can serve as a reliable guide during your journey. This preparation can be vital in emergencies, ensuring you have a dependable navigation tool.
Finally, always carry a small pencil or pen in your survival kit, which can help you create clear and accurate maps. This skill not only aids in navigation but also boosts your confidence in unfamiliar environments, enhancing your overall preparedness. This proactive approach to navigation is essential for any adventurer.
- Using charcoal or mud to draw terrain outlines for navigation
- Marking significant landmarks and resources on your improvised map
- Estimating distances accurately for better navigation guidance
- Carrying a pencil or pen for permanent mapping creations
Employing Whistles and Other Audible Signals for Effective Rescue
Audible signals play a vital role in attracting attention during rescue situations. A whistle is one of the most effective tools you can carry, as it can be heard from long distances, even in noisy environments, without exhausting your voice. Select a whistle that is both lightweight and durable, ideally one that can withstand the elements. This ensures that you have a reliable signaling tool when needed most.
To signal for rescue, use a standard pattern of three short blasts, which is universally recognized as a distress signal. Repeat this pattern intermittently to conserve your energy while maximizing visibility and increasing your chances of being noticed by potential rescuers. This strategy can significantly enhance your chances of success in emergencies.
In addition to whistles, consider utilizing other audible signals, such as bells or even creating noise with natural materials. For instance, you can tie a few small rocks together to create a makeshift rattle, which can be used to signal your location effectively. This creativity can add another layer to your signaling strategy.
Another technique is to use sound-making objects in conjunction with visual signals, such as smoke from a fire or brightly colored materials. This multi-sensory approach increases your chances of being noticed by rescuers, adding another layer of safety to your survival strategy. Such strategies enhance your overall preparedness for any situation.
- Carrying a durable whistle for long-distance signaling
- Using a three-blast pattern for recognized distress signals
- Creating noise with rocks or other materials for effective signaling
- Combining audible signals with visual cues for enhanced effectiveness
Maintaining and Repairing Your Survival Gear Effectively
Basic Repair Techniques for Fabric and Clothing Items
Maintaining and repairing fabric gear is crucial for ensuring its longevity and functionality in survival situations. Simple sewing skills can go a long way in reinforcing or patching up clothing, tents, and other fabric items. A basic needle and thread can help repair torn seams or small holes. Before you begin, ensure the fabric is clean and dry, facilitating easier repairs and preventing further damage. This preparation can significantly enhance the effectiveness of your repairs.
For larger tears, consider using fabric patches to repair the damage. Cut a patch from durable fabric, ideally the same color or material as the original item. Sew the patch over the damaged area, ensuring that you reinforce the edges to prevent further tearing and extend the gear's lifespan. This attention to detail can greatly improve the durability of your gear.
If you have access to duct tape, it can serve as a temporary fix for fabric items. Apply a strip over the tear, smoothing it down to create a waterproof seal. This quick solution can get you through critical times until a more permanent repair can be made. Such adaptability is crucial when time is of the essence in survival scenarios.
Additionally, for outdoor gear, regularly inspect fabric items for wear and tear, especially around seams and high-stress areas. Preventive maintenance can save you time and resources, ensuring your gear remains in top condition when you need it most. This proactive approach to maintenance is essential for effective survival preparedness.
- Using a needle and thread for basic fabric repairs effectively
- Applying fabric patches for larger tears and damage
- Utilizing duct tape as a temporary fix for immediate repairs
- Regularly inspecting gear for wear and tear to maintain functionality
Maintaining Waterproofing on DIY Gear for Optimal Performance
Waterproofing is essential for survival gear, particularly in wet environments where moisture can compromise the integrity of your items. To maintain waterproofing, start by selecting the right materials; choose fabrics with inherent waterproof properties, such as nylon or treated canvas, that can withstand exposure to the elements. This selection is crucial for ensuring your gear remains effective in adverse weather conditions.
If you have gear that requires treatment, waterproofing sprays can be applied to create a protective barrier. Ensure the surface is clean before applying the spray, then apply it evenly and allow it to dry completely. This treatment can help repel water and extend the life of your gear, ensuring you remain dry when it matters most. This proactive approach enhances your overall preparedness for various environments.
For homemade shelters, consider using a tarp or waterproof canvas as a roof. Regularly check for holes or tears, and patch them immediately to prevent leaks and maintain the structure's integrity. When storing gear, ensure it is kept in a dry, cool place, away from direct sunlight, which can degrade waterproof materials over time. This attention to detail can significantly enhance your gear's performance.
Additionally, familiarize yourself with techniques for sealing seams, such as using seam tape or silicone sealant, to enhance waterproofing. These steps will ensure your gear remains reliable, no matter the conditions you face. This proactive approach to maintenance is essential for ensuring your survival gear is ready for action.
- Selecting waterproof materials for effective gear construction
- Applying waterproofing sprays for added protection against moisture
- Using tarps or waterproof canvas for shelters to ensure dryness
- Sealing seams with tape or silicone for enhanced durability
Repairing and Sharpening Tools and Weapons for Maximum Efficiency
Keeping tools and weapons in peak condition is crucial for survival scenarios. Regular maintenance not only extends their life but also ensures they function effectively when you need them the most. For sharpening knives and other cutting tools, a sharpening stone or honing rod will be your best friend. Start by holding the blade at a 20-degree angle against the stone, applying even pressure as you slide the blade across the surface in a sweeping motion to achieve a sharp edge. This technique is vital for ensuring your tools are always ready for use.
For larger tools, such as axes or machetes, use a file to grind down nicks and dull edges. After sharpening, wipe down the blade to remove any metal shavings and apply a light coat of oil to prevent rust and maintain the blade's integrity. This maintenance routine is essential for ensuring your tools remain functional and reliable.
Regularly inspect tools for any loose parts or damage. If you notice a handle coming off, use wood glue and clamps to secure it. For small fixes, duct tape can serve as a temporary solution until you have the chance to perform a proper repair. This adaptability can be crucial in emergencies, ensuring your tools are always in working condition.
Lastly, always keep your tools clean and lubricated to ensure their longevity and functionality. This proactive approach can make a significant difference when you’re relying on them in critical moments, ensuring you have dependable tools at your disposal. Such preparedness is essential for effective survival management.
- Using sharpening stones for effective blade maintenance
- Employing files for larger cutting tools to improve functionality
- Inspecting tools for loose parts and damage regularly
- Cleaning and lubricating tools regularly for longevity and reliability
Cleaning and Lubricating Mechanical Parts of Your Gear
The mechanical components of your survival gear, such as hinges, locks, and moving parts, require regular cleaning and lubrication to maintain optimal functionality. Dust, mud, and grime can accumulate, causing components to wear out prematurely. Start by disassembling the parts if necessary, and use a soft brush or cloth to wipe away debris, ensuring everything operates smoothly. This maintenance routine is essential for ensuring your gear is ready for use at all times.
For lubrication, apply a light oil, such as machine oil or vegetable oil, to moving parts. This will prevent rusting and ensure smooth operation. Avoid using too much oil, as excess can attract dirt and debris, leading to further issues down the line. This careful approach can significantly enhance your gear's lifespan.
When cleaning, be sure to check for signs of wear or damage. If you notice parts that have become loose, consider tightening screws or replacing worn components. For tools like folding knives, ensure the pivot point is free of obstruction to allow for easy opening and closing when needed. This attention to detail can greatly enhance the functionality of your tools.
Lastly, creating a maintenance schedule for your gear can help you stay organized and proactive. Regularly check mechanical parts after each use or at least once a month to ensure they are functioning correctly. This diligence will keep your gear ready for action when you need it the most. Such organization is key for effective survival preparedness.
- Cleaning mechanical parts with a soft brush or cloth for optimal performance
- Applying light oil for lubrication to prevent rust and ensure smooth operation
- Checking for wear and tightening screws when necessary for reliability
- Creating a maintenance schedule for gear inspection to stay proactive
Inspecting and Replacing Worn Components for Reliability
Regular inspections of your survival gear are essential for ensuring its reliability and functionality. Start by examining the stitching on fabric items, checking for frays or tears that may compromise their strength. If you find any, address them immediately by sewing or patching to prevent further damage and ensure your gear remains dependable. This proactive approach is crucial for maintaining the integrity of your equipment.
For components such as buckles, zippers, and straps, look for signs of wear or damage. If any part is compromised, replace it with a durable alternative to maintain the integrity of your gear. Keep a small kit with spare parts and tools handy in your survival gear to facilitate quick repairs in the field. This preparedness can significantly enhance your effectiveness in emergencies.
Additionally, inspect tools for rust or corrosion, especially on metal components. Clean these areas with a rust remover, then apply oil to protect against future wear and ensure your tools remain in good working condition. This regular maintenance can make a significant difference in the longevity of your equipment.
Incorporating preventive measures such as careful storage and regular maintenance checks will ensure that your gear remains functional and reliable. This proactive approach to inspection and replacement ultimately enhances your preparedness and confidence in survival situations. Such diligence is key for effective survival management.
- Examining stitching for frays and tears to maintain fabric integrity
- Replacing worn buckles, zippers, and straps with durable alternatives
- Cleaning rust and applying protective oil to enhance tool longevity
- Maintaining a kit of spare parts for quick repairs and replacements
Research-Backed Benefits of Homemade Survival Gear
Expert Insights on the Psychological Benefits of Crafting DIY Survival Gear
Creating your own survival gear has profound psychological benefits that can enhance resilience and preparedness. Engaging in DIY projects fosters a sense of achievement and empowerment, as you take control of your survival preparations. This proactive mindset can significantly reduce anxiety and boost confidence, knowing you’ve equipped yourself with the necessary tools to navigate unexpected situations. This mental fortitude is invaluable in emergencies.
Moreover, the process of making gear often involves problem-solving and critical thinking, which can improve cognitive flexibility. As you learn to adapt materials and techniques, you develop a mindset that is better equipped to handle challenges. This adaptability translates to improved mental resilience when faced with stressful situations, making you more capable in emergencies. Such mental preparedness is essential for effective survival.
Additionally, crafting gear can provide a sense of connection to nature, reinforcing a deeper appreciation for one's environment. This connection can lead to enhanced focus and clarity, further preparing you mentally for survival scenarios. By building your survival gear, you not only equip yourself physically but also cultivate a robust psychological foundation essential for thriving in challenging situations. This holistic approach enhances your overall survival capability.
- Boosting confidence through self-made gear and projects
- Enhancing problem-solving skills through creative crafting
- Creating a connection to nature through hands-on DIY projects
- Reducing anxiety by taking control of survival preparations actively
Real-World Examples of DIY Gear Outperforming Commercial Options
There are numerous instances where homemade survival gear has outperformed commercial products. One notable example involves a hiker who, faced with unexpected rain, used a homemade tarp shelter crafted from a large garbage bag. In contrast, others struggled with expensive, bulky tents that failed to keep them dry. This resourcefulness highlighted the effectiveness of DIY solutions in unpredictable weather conditions, proving that adaptability is key in survival scenarios. Such examples underscore the value of creativity in emergency situations.
Another example is the use of DIY fire starters made from common materials, such as cotton balls and petroleum jelly. Adventurers have reported higher success rates with these homemade fire starters compared to commercial options, particularly when needing to ignite wet wood that would otherwise be difficult to light. This effectiveness can make a significant difference in survival situations.
Similarly, many survivalists have found that homemade water purification systems, utilizing simple filters made from charcoal and sand, often perform just as well, if not better, than store-bought filters. This hands-on approach enables users to tailor their gear to specific conditions, demonstrating that customization can lead to better outcomes in survival situations. Such insights emphasize the importance of resourcefulness and creativity in effective survival management.
These real-world examples illustrate the effectiveness of thoughtful, homemade survival gear, emphasizing the importance of adaptability and resourcefulness in overcoming challenges while enhancing your chances of survival. This flexibility is crucial for any adventurer.
- Homemade tarp shelters outperform commercial tents in adverse conditions.
- DIY fire starters ignite wet wood more effectively than store-bought options.
- Water purification systems tailored to specific conditions yield better results.
- Resourcefulness leads to better survival outcomes in critical situations.
Actionable Steps for Integrating Homemade Gear into Your Survival Kits
Integrating homemade gear into your existing survival kit can enhance its effectiveness and versatility. Start by assessing your current kit to identify areas where you can substitute or augment with homemade solutions. For example, replace store-bought fire starters with DIY options, such as cotton balls dipped in petroleum jelly, which are lightweight, easy to make, and highly effective. This simple change can significantly enhance your readiness for emergencies.
Incorporate multi-purpose tools, such as a paracord bracelet that can unravel into cordage, into your kit to save space while maximizing functionality. Additionally, consider adding a small solar dehydrator to your food preservation section, allowing you to extend the shelf life of your supplies seamlessly and sustainably. This addition can greatly enhance your food management capabilities.
It’s also important to create a designated section in your kit for homemade gear, ensuring that you can quickly access these items when needed. Keep a list of your homemade items and their uses, so you’re familiar with how to deploy them effectively in emergencies, enhancing your preparedness. This organization is key to effective survival management.
Lastly, regularly practice using your homemade gear in various scenarios. This hands-on experience will boost your confidence and ensure that you are prepared to utilize your gear effectively when it matters most, making you a more capable survivor in critical situations. This proactive approach is essential for enhancing your overall survival strategy.
- Assessing your current kit for potential upgrades and improvements
- Incorporating multi-purpose tools for enhanced versatility
- Creating a designated section for homemade gear within your kit
- Practicing with your homemade gear regularly to build confidence
Frequently Asked Questions (FAQs)
What is homemade survival gear?
Homemade survival gear consists of tools and equipment crafted from readily available materials to aid in survival situations. This can include anything from fire starters to shelters, created using DIY techniques that enhance your preparedness and emergency readiness.
Why is it important to create your own survival gear?
Creating your own survival gear allows for customization, cost-effectiveness, and adaptability to specific environments or situations, significantly enhancing your chances of survival when faced with unexpected challenges.
How can I purify water using homemade methods?
You can purify water by boiling it, using charcoal as a filter, or treating it with unscented bleach. These methods effectively eliminate harmful pathogens, making water safe to drink in survival scenarios.
What are some effective DIY fire starters?
Effective DIY fire starters include cotton balls dipped in petroleum jelly, cardboard egg cartons filled with dryer lint, and toilet paper tubes stuffed with dry grass or lint, all of which are easy to make and use.
How do I build a shelter in a survival situation?
To build a shelter, use available materials like branches and leaves to create a lean-to or debris hut. Ensure it’s insulated and has a solid roof to protect against the elements, providing you with a safe space.
What basic first aid skills should I know?
Essential first aid skills include cleaning wounds, applying bandages, using cold compresses for injuries, and knowing CPR techniques for emergencies, all of which can significantly improve survival chances.
How can I preserve food for long-term storage?
Food can be preserved through various methods, including smoking, drying, and fermentation. Techniques such as using a solar dehydrator or creating pickles and fermented vegetables can significantly extend shelf life, ensuring you have food when needed.
What navigation tools can I create?
You can create a compass using a magnetized needle and a bowl of water. Other tools include signal mirrors and improvised maps made from natural materials, all of which enhance your navigation skills in the wilderness.
How do I maintain survival gear?
Maintain survival gear by regularly inspecting it for wear, cleaning and lubricating mechanical parts, and repairing any damage promptly to ensure functionality and reliability when you need it most.
What psychological benefits come from making your own gear?
Making your own gear enhances self-reliance, builds confidence, and fosters a proactive mindset. These benefits contribute to improved mental resilience in survival situations, equipping you to handle challenges more effectively.
Explore our journey on X!
The post Homemade Survival Gear: Essential DIY Tools appeared first on Survival Bite.
The Article Survival Gear: Essential DIY Tools for Homemade Preparedness Was Found On https://limitsofstrategy.com
The Article Survival Gear: Must-Have DIY Tools for Home Preparation First Appeared ON
: https://ad4sc.com